GRUB2

As complicated as today’s operating systems get, the computer boots following some pretty simple steps.

  1. BIOS creates a device map listing the disks (in the order from which they should boot based off the BIOS)
    Here is an example from Windows 10 EFI shell showing 2 disks – hd1 and hd2. It also lists other
    attributes (the path PCIroot/ PCI device 12 / SATA controller 1 / disk1 and disk2

    Blk0 :HardDisk – Alias (null)
    PciRoot (0x0) /Pci(0x12, 0x0) /Sata(0x1, 0xFFFF, 0x0) /HD(1, MBR, 0xAAD15D3F, 0x800, 0xC350000)
    Blk1 :HardDisk – Alias (null)
    PciRoot (0x0) /Pci(0x12, 0x0) /Sata(0x1, 0xFFFF, 0x0) /HD(2, MBR, 0xAAD15D3F, 0xC350800, 0xC350000)

Notes:
You can find the ‘bios-hint’ of a device (this will change if you update BIOS boot order or if a device is not alive or if you change the PC cabling).
Here are some sample commands to understand ‘hints’ in grub.cfg
# grub2-probe -t bios_hints –device /dev/sda3 :: hd0,msdos3 (disk starts with disk0, part’n starts with 1 like the Linux OS)
# grub2-probe -t hints_string –device /dev/sdc1 :: –hint_bios=hd2,gpt1 –hint-efi=hd2,gpt1 –hint-baremetal=ahci2,gpt1
# grub2-probe -t fs –device /dev/sdc1 :: ext2 ( actually ext4, but good enough )
# grub2-probe -t fs_label –device /dev/sdc1 :: hd2,gpt1 ( xfs_admin -L cent-root /dev/xvda1
or tune2fs -L filesys-label /dev/mapper/fedora_localhost )
# grub2-probe -t fs_uuid –device /dev/sdc1 :: 3cae8841-c7cd-4265-af41-058d1c80fece
This UUID is pretty much random, you can change it with ‘xfs-admin -U 3cae… /dev/xvda1’
# grub2-probe -t disk –device /dev/disk/by-id/3cae8841-c7cd-4265-af41-058d1c80fece :: /dev/sdc1
# grub2-probe -t disk –device /dev/disk/by-label/CentOS :: /dev/sdc1


Here is good documentation for GRUB2
https://documentation.suse.com/sles/15-SP1/html/SLES-all/cha-grub2.html

Areca RAID Controller – RAID0 to RAID1


ArecaRAID_0to1status

The picture shows the end result – RAID1 is being built out on the imported second drive.


I have a 2-port RAID controller (ARC-1200).  I installed Windows to one drive (RAID0) and wanted to mirror it to a second drive. This was not entirely intuitive.

I accomplished it as follows:

  1. Install the software named  ArcSAP.  It’s so much easier to do this stuff using a GUI than through the BUI ASCII graphics.
  2. Here was my situation after installing ArcSAP:
    ARC-1200
    +RaidSet1
    + VOL00
    Single SSD on channel 2
    Free Drive on channel 1
  3. The ‘Expand Raid Set’ did not work for me – it only saw the RAID0 drive in the raidset and I could not find an option to add the free drive to the raidset so that I could expand onto it.

    Instead I clicked on the controller in the left window, then on the CLI tab in the right window.
    CLI> disk info
    #   Ch#    ModelName              Capacity                 Usage
    =================================================================
    1   1        CT500MX500SSD1    500.1GB                  Free
    2   2        CT500MX500SSD1   500.1GB                   RaidSet1
    =================================================================
    CLI> rsf ?
    CLI>   rsf   expand   raid=1   drv=1           [ I could have added vol=0 ]
    GuiErrMsg<0x00>: Success.

    CLI> rsf info raid=1
    Raid Set Information
    ===========================================
    Raid Set Name : RaidSet1
    Member Disks : 2
    Total Raw Capacity : 1000.0GB
    Free Raw Capacity : 500.0GB
    ===========================================

    The bonus tip is how to stop the beeping. You can mute the beeper, but
    you are forced to reboot. From ArcSAP click the controller then ‘RAID Operations’/Advanced Features. This  pulls up a browser window
    to talk with the McRAID storage manager – an ArcHTTP proxy web server
    that can talk with the RAID card through the PCIe bus on the motherboard!
    Seriously nerdy.  For me the URL is ‘http:// the IP of my local machine colon port 2243’   It may be possible to access  this from an outside machine, but that didn’t work for me.  Know that the default account is ‘admin’ with password of 0000 (number zero four times).

    In the McRAID click ‘System Config’, System Beeper Setting – change to Disabled. Click the ‘[x] Confirm the Operation’ box then the Submit button. Or do the equivalent from the text BUI.

Before you go –  Here is a small paradigm-nudging thought from John Bach, President of Puget Sound computers.

Annual Drive Failure rates average less than 2% if you treat them properly (BackBlaze publishes figures in the low 1%, with four times the average failure rate happening during the first half-year burn-in period and about the same failure rates after 4-5 years).
However, failures of RAID is a dozen times higher (in John’s opinion). This is very counter-intuitive. All businesses use RAID. They would be stupid not to – in a server with a dozen drives running constantly for several years, you are certain to have a disk failure which RAID turns into a non-event. Plus, RAID drives are faster.

There are several big differences, though, for home users. First few home users have dozens of drives in their RAID. Your disk failure rate is an order of magnitude less. Second a home user can afford downtime (to reload an OS and/or restore data from backups) that a business cannot plus the missing data is not likely to cause a major financial penalty). Third, businesses buy better quality raid cards (and still the raid cards mess up and lose raid configurations.  Lastly and most critically, because businesses run dozens of RAID cards, the drive replacement procedure is known. A home user has to guess his way through. He is MUCH more likely to experience User Error:  Do I try to mark the drive bad before removing it? What is the difference between activate and recover? (the answer is – activate will let you boot up on a sub-optimal array, recover will try to rebuild a lost raid configuration)?  How do I grow a raid1 array to use larger disks? (answer, If you don’t have a free port on the raid controller, break the small raid1 by removing a drive, activate it the degraded array to boot to the OS, then powerdown and  add a larger disk as a raid0 disk. Mount this new disk to the OS and use a third party software like EaseUS or bett Aomei to dupe the small RAID1 to the larger RAID0. Remove the old RAID1 drive and boot. Run a partition check. When you are comfortable with the new drive,  follow the process above to upgrade your RAID0 to RAID1).

Putty Error – unexpected SSH2_MSG_UNIMPLEMENTED packet

This shows that the server is running a newer, stricter version of SSHd that fails when our client tries a less-secure key exchange – the generic ‘Diffie-Hellman group exchange’. Not to worry, we just tell putty to propose a stricter key exchange with the server, namely the ‘Diffie-Hellman group 14’ algorithm.

Select it, click the [Up] button to move it to the top of the list. Done. Retry your connection.

This shows the corrected settings (after moving group 14 to the top).

Kitty__SSH2-MSG-Unimplemented-Error


SQLplus Foo


I pity the foo that cannot write SQL


 --- TC_StuckDev_GroupCount.sql
 ---
 --- Author: Adam DeRidder
 --- Date : 04-Aug-2017
 ---

 SET PAGESIZE 0
 SET LINESIZE 200
 COLUMN  MyCount    FORMAT 9999
 COLUMN  DTN        FORMAT A30
 COLUMN  MyValue    FORMAT A10
 COLUMN  Spoolname  new_val     SpoolVariable
---  Spool output to file OutputDir/TampaTC_StuckDevices_GroupByDev_21Sep2017.csv
---  where the date is today date. Overwrite a file with the same name
---  new_val sets SpoolVariable to contain the string SpoolName built from a fake query to non-existant table dual
 SELECT     'TampaTC_StuckDevices_GroupByDev_' || to_char(sysdate,'ddMonyyyy') || '.csv' Spoolname FROM dual;
 SPOOL      'OutputDir/&SpoolVariable' REPLACE;
 --- Total Count of Devices that activated more than 12hours ago but are still contacting TC
 ---  So activatedtime is more than 12hrs ago, contacttime is less than 12hrs ago
 
 SELECT 'Devices that activated over 12hrs ago but are still contacting TC: ', count (1)
   FROM device d
   WHERE d.deleted = 0 AND
      (lastactivationtime < (sysdate - interval '12' Hour)) AND
      (lastcontacttime    > (sysdate - interval '12' hour));
---    INNER JOIN is a snooty DBA way of joining tables like  'where d.id = v.device_id'
 SELECT 'Total Count of Devices that have a NULL DynamicValue: ', count (1)
  FROM device d
       INNER JOIN dynamicvariable v ON d.id = v.device_id
  WHERE d.deleted = 0   AND
      (lastactivationtime < (sysdate - interval '12' Hour))   AND
      (lastcontacttime > (sysdate - interval '12' hour))      AND
      v.value is NULL;
## This is the cool stuff right here. 
## This function skips printing the 'value' column if it is a duplicate of the previous line
## using NULLIF and LAG..OVER primitives
## So lines 2-6 all refer to Device2. The final number is count of devicetype with Value tag.
## I manually added the (null) tags to the output to clarify it

SELECT 'Distribution of recent devices that have a Dynamic Variable:' from DUAL; 
---
SELECT NULLIF(device_type_name, lag(DeviceTypeName) over 
     (partition by DeviceTypeName order by count(1))) DTN, 
      v.value MyValue,    count(1) MyCount
 FROM device d 
     INNER JOIN DynamicVariable v  ON  d.id = v.device_id 
     INNER JOIN devicetype     dt  ON  dt.id=d.devicetype_id
 WHERE d.deleted = 0 AND
           (lastactivationtime < (sysdate - interval '12' Hour))   AND 
           (lastcontacttime > (sysdate - interval '12' hour)) 
 GROUP BY v.value, device_type_name 
 ORDER BY device_type_name, v.value;

SPOOL OFF

Resulting table

Device1       (null)    9
Device2       fios1     1
              fios2     2
              fios3     1
              fios5     1
              (null)    2
Device3       fios5     1
Device4       fios5     1
              fios5     4


Solaris quirk. bc = bad calculator

Solaris is quirky. Sometimes it’s well ahead of the curve – zfs, LDOMs, Solaris11 networking  are all visionary.  Then there are things that are SOO00 backward.

Here’s an example with the calculator – bc.

On Linux (or MacOS), you can pass a comparison to bc and it will tell you whether it is right (returns a one) or wrong (returns a zero).

KyloRen:~userme:$   echo "1<2"| bc
1
KyloRen:~userme:$ echo "2<1"| bc

Solaris10  is not so similarly helpful:

userme@sol10:$ echo "1<2" | bc
  syntax error on line 1, teletype

Instead you have to use an archaic invocation (I guess it’s based off an older bc release).  And if it fails, it returns NOTHING.  And even if you agree to comply with its anachronistic invocation, you cannot get it to sanely return zero in case of failure.

Bugger Solaris with a flowerless rosebush!!

userme@sol10:$  echo "if (1<2) 1" | bc
1
userme@sol10:$  echo "if (1<2) 1" | bc
userme@sol10:$  
userme@sol10:$  echo "if (2<1) 1 else 0" | bc
  syntax error on line 1, teletype


Veritas Volume Manager 5 cannot add internal disks.

Note: This is OUTDATED info – applies to VxVM5 from about 2006 running on internal disks on Linux. It may not apply to your fancy, modern VxSFHA binaries. It does not apply to Solaris.

Problem :   Veritas [vxdiskadd] refuses to add disks on a Linux server (internal disks).

Symptom:
vxdisksetup ERROR V-5-2-1814 sdb:    Invalid disk device for ‘cdsdisk’ format

    Attempt 0:  Initial Troubleshooting

Try different similar commands. Try vxdisk init. Try vxdg init dg_ota disk=sdb. Try encapsulating the disk. These approaches failed.

    Attempt1:  Is the disk labelled (with a partition table)? Is it in use by something else?

No data on the disk. One LVM partition was created. I deleted this and created a single standard DOS partition to ensure the label and put it in a commonly accepted disk layout which VxVM should recognize. This failed to resolve the problem

    Attempt2:   What is unusual about these disks?

They are internal disks, no multipathing, managed by an integrated IBM-rebranded LSI RAID controller. This means that vxddladm did not recognize the “enclosure”. It saw the disk (# /etc/vx.d/diag.d/vxdmpinq sdb -> IBM ServRAID M5110e ). I tried manually adding it, but that caused it to see only a single disk. And this was overkill. I didn’t really want to define a new enclosure. I just wanted it to see the disks – skip the multipathing. So I deleted the enclosure and started looking at the ‘vxddladm addforeign’ command (which lets the enclosure handle MP).  Before trying this,  I noticed a different approach, which worked …

    Solution:

Create the disks NOT as the default-CDS, but instead as sliced. 

The actual problem seems to be that the CDS is based on a solaris-style partition table – it assumes a partition table of 8 entries and uses the 8th one (for both private and public regions-surprisingly). This fails with a DOS-based MBR 4-partition table/label, whereas a ‘sliced’ disk uses 4th partition (for data), 5th partition as private region and 6th partition as the entire disk.
It is likely that I could have used a ‘simple’ disk instead, but a sliced is more compatible
and (apparently) could be converted to a standard CDS disk. The limitation is that sliced
disks could not be imported by a server with a very different architecture (little-endian CPU). This limitation does not apply in this case.

Linux : Predictable Network Interface Names

SystemD: Understanding  Predictable Network Interface Names

Source 1: http://blog.laimbock.com/2014/11/22/systemd-understanding-predictable-network-interface-names/   by Patrick Laimbock
Source2: https://major.io/2015/08/21/understanding-systemds-predictable-network-device-names/   by  Major Hayden


Posted on November 22, 2014 by Patrick Laimbock

Here is an explanation of how SystemD predictable network interface names are determined.

Predictable network interface device names are based on:
– firmware/bios-provided index numbers for on-board devices
– firmware-provided pci-express hotplug slot index number
– physical/geographical location of the hardware
– the interface’s MAC address

Two character prefixes based on the type of interface:


en Ethernet
wl WLan
ww WWan


Type of device names :
b                                    — BCMA bus core number
ccw                               — CCW bus group name
o                                    — on-board device index number
s[f][d]                          — hotplug slot index number
x                                    — MAC address
[P]ps[f][d]                 — PCI geographical location
[P]ps[f][u][..][c][i] — USB port number chain

USB Device
For USB devices, the full chain of port numbers of hubs is composed.
If the name gets longer than the maximum number of 15 characters the name is not exported.
The usual USB configuration == 1 and interface == 0 values are suppressed.

PCI Device
Format of the name: en + [P]ps[f][d]
All multi-function PCI devices will carry the [f] number in the device name including the function 0 device.

When using PCI geography the PCI domain is only prepended when it is not 0.

 
The magic (for naming network interfaces) happens in the source code file named “link-config.c”. It shows that the system searches the udev database in the following order to find out what to call an interface:

  • ID_NET_NAME_FROM_DATABASE
  • ID_NET_NAME_ONBOARD
  • ID_NET_NAME_SLOT
  • ID_NET_NAME_PATH
  • ID_NET_NAME_MAC

Here’s how you can dump the udev database:
# udevadm info e | grep A 11 ^P.*eno1
will select 11 lines after the header for for the ‘eno1’ device, you may need to adjust the number. Or run something like
udevadmin info
udevadm info -p /sys/devices/]

PCI ethernet card with firmware index “1”:
o                                    — on-board device index number
1 ID_NET_NAME_ONBOARD=eno1          (that’s three letters and a number)
2 ID_NET_NAME_ONBOARD_LABEL=Ethernet Port 1

PCI ethernet card in hotplug slot with firmware index number:
1 /sys/devices/pci0000:00/0000:00:1c.3/0000:05:00.0/net/ens1
2 ID_NET_NAME_MAC=enx000000000466
3 ID_NET_NAME_PATH=enp5s0
4 ID_NET_NAME_SLOT=ens1

PCI ethernet multi-function card with 2 ports:
1 /sys/devices/pci0000:00/0000:00:1c.0/0000:02:00.0/net/enp2s0f0
2 ID_NET_NAME_MAC=enx78e7d1ea46da
3 ID_NET_NAME_PATH=enp2s0f0
4 /sys/devices/pci0000:00/0000:00:1c.0/0000:02:00.1/net/enp2s0f1
5 ID_NET_NAME_MAC=enx78e7d1ea46dc
6 ID_NET_NAME_PATH=enp2s0f1

PCI wlan card:
1 /sys/devices/pci0000:00/0000:00:1c.1/0000:03:00.0/net/wlp3s0
2 ID_NET_NAME_MAC=wlx0024d7e31130
3 ID_NET_NAME_PATH=wlp3s0

USB built-in 3G modem:
1 /sys/devices/pci0000:00/0000:00:1d.0/usb2/2-1/2-1.4/2-1.4:1.6/net/wwp0s29u1u4i6
2 ID_NET_NAME_MAC=wwx028037ec0200
3 ID_NET_NAME_PATH=wwp0s29u1u4i6


How to turn it off

There are 4 ways to turn it off and get back your old trusted network interface names (like ethX etc.):

A. Boot the kernel with net.ifnames=0 (might also need biosdevname=0)

B. Disable the assignment of fixed names so that the unpredictable kernel names are used again by masking udev’s rule file for the default policy:
ln -s /dev/null /etc/udev/rules.d/80-net-setup-link.rules
(since v209: this file was called 80-net-name-slot.rules in release v197 through v208)

C. Use your own manual naming scheme (e.g. “internet0″, “dmz0″ or “lan0″) by creating your own udev rules file and set the NAME property for the devices. Make sure to order it before the default policy file, for example by naming it
/etc/udev/rules.d/70-my-net-names.rules

D. Alter the default policy file for picking a different naming scheme for example for naming all interface names after their MAC address by default:
cp /usr/lib/udev/rules.d/80-net-setup-link.rules /etc/udev/rules.d/80-net-setup-link.rules Then edit the file there and change the lines as necessary.

Linux Cornucopia – A Horn o’ Plenty spilling over with Linux/Unix scriptlets, memelets, and tiny tips

This post is the beginning of what will become a group of tips / pointers / sketches of ideas / commands, each individually not worth its own full blog post, but hopefully as a group worth their collective bits. 

 Who killed my process? 

If you’re trying to track what process killed another,  here are two ways::

A)  auditd :
* root@host:# auditctl -a  exit,always -f arch=[b32|b64] -S [kill|tkill|tgkill]  -k KillRule_926  (pick one or more variations)

Running a kill against a process generates 2 audit log messages that look somewhat like this :

root@host:#   ausearch -k “KillRule_926” 
               SYSCALL … syscall=37  success=yes  pid=3936 comm=”killall”  key=”KillRule_926″ ..
               OBJ_PID …  opid=1968  exe=”/bin/bash”  key=”KillRule_926″ 

Where pid is the killer process (invoked by command comm), opid is the victim.  key is an arbitrary audit log “filter key” that appears in the resulting audit log entries to make it easier to extract them.

B) SystemTap :
Instrumenting the entire OS with SystemTap to track down a dying process is surely a judgment call, not your first reaction, but if you choose this route:
* Install SystemTap  perfmon tool
* Run or tweak the   sigmon.stp   script   (these live in /lib/modules/<kernel_version>/systemtap)
* Disable all unnecessary probes.

Linux Daemons 

( Liberal Cloning from here. )

Commands :
/sbin/service   –status-all
/usr/bin/system-config-services           #GUI

Rule Name Type Description Enabled Status
acpid Hardware Power Recommended-On
anacron Jobs Run missed cron jobs Recommended-On
apmd Hardware Use ACPId instead Recommended-Off
atd Jobs Job Scheduling – at Recommended-On
auditd Security Log OS events Recommanded-On
avahi Network Network Sharing Rare
bluetooth / hidd / pand Hardware Bluetooth Devices Rare
dhcdbd Hardware DBus IF to DHCP – NetMgr Optional
gpmd Hardware Mouse in text app Rare
hald Hardware Hardware Abstraction Layer Mandatory
hsqldb DB Used by Open Office, apps Desktop
iptables Security Software Firewall Recommended-on
irqbalance Jobs Distrib SMP jobs Recommended-on
kudzu Hardware Hardware Detection at boot Recommended-on
lisa Network Windows Sharing Recommended-on
lm_sensors Hardware poll sensors Servers
mdmonitor Storage mdadm util Servers
mdmpd Storage multipath healing Servers
messagebus Hardware D-Bus daemon (HW alerts) Recommended-on
ifplugd Network autoup NIC when plugged Desktop
NetworkManager Network wifi, HW NIC switching Desktop
nscd Network DNS Cache Server
portmap Network RPC Manager (NISd or NFSd) Server

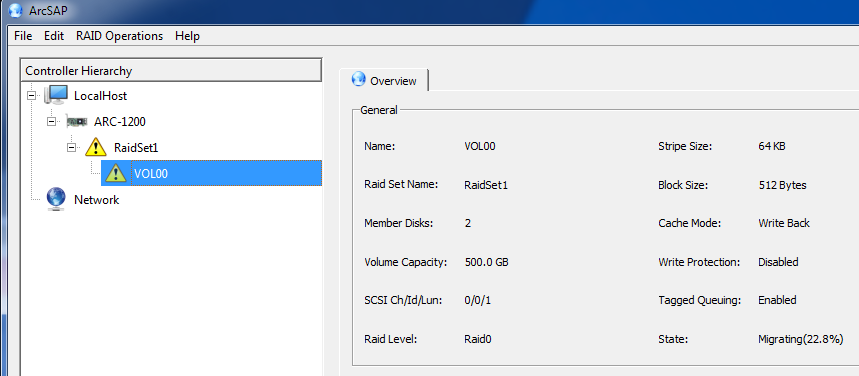
Resize an LVM Partition

Now resize with [ pvresize & lvextend & ] resize2fs
root@host:# resize2fs -p /dev/mapper/mpath2

Linux Raid and Volume Mgmt

dmraid

What is dmraid?
BIOS-assisted, software RAID, with OS-driver. Works with well multipathing.
A better alternative to mdadm – emulates hardware RAID.
pro: Understands more formats of RAID headers than mdadm [ run ‘dmraid -l’ for a list ]
con: Does it handle partitions larger than 2TB?
pro:  Some cases support rebuilding a mirror before the OS boots, which can never happen with software raid.
Note: Sample Device Name :: dm-46

Sample mdadm Commands
HowTo Discover and enable HW Raid sets:   modprobe dm_mod && dmraid -ay && ls -l /dev/mapper
HowTo Disable HW Raid sets :   dmraid -an
HowTo Disable MultiPath :        dmsetup remove_all AND mv /lib/udev/rules.d/64-md-raid.rules /lib/udev/rules.d/DISABLED_RULES/64-md-raid.rules
HowToBypass DM-raid (failed mirror) :  LiveCD boot.  vi /etc/fstab [ remove references to failed RAID ]

mdadm

What is mdadm? Alternative to dmraid.
mdadm /mdraid – software raid.
con: mdadm devices do not work with multipathing
LVM
con: lvm  good volume mgmt, but no raid

* dm-multipathing – handles hot-plug or boot-time multipathing
Notes:
If you setup RAID via BIOS (say for Windows) and it fails, LiveCD boot to Linux and use mdraid (software raid) to fix the problem. Do not use DMraid (HW).

root@lnxprd00:# dmsetup info
Name:                   mpath2
State:                    ACTIVE
Read Ahead:           256
Tables present:       LIVE
Open count:           1
Event number:       1
Major, minor:         253, 4
Number of targets:  1
UUID:                    mpath-350002ac0004d135d

# HP-UX : create NFS mountpoint and auto-mount it
roo@HP-UX:# mknfsmnt -B -A -S -f /NFS_backup -d /tinleypark -h auspcrpbak03
permanent = -B ;  automnt = -A   ;     soft : -S (uppercase)

# Show OS release on linux
rpm -qa redhat-release   (shows)   “redhat-release-5Server-5.8.0.3”

# Set Date on a Linux server
date -d @1358252055 -> “Tue Jan 15, 2013 ….” # convert epoch date to User time

# For ‘ magic keys ‘ to work, you need to add
/etc/sysctl.conf : kernel.sysrq=1
sysctl -p
Alt + SysRq/PrtScrn + S = sync
Alt + SysRq/PrtScrn + B = reBoot   OR   Alt + SysRq/PrtScrn + O = power Off

> IP Tables – based SysRq [ http://marek.terminus.sk/prog/ipt_sysrq.shtml ]
ipt_sysrq module : send a sysrq over the network ( from an IP-restricted host )
# If sent in the last 43200 seconds (to allow for drift if NTP isn’t working)
/etc/modules.conf : modprobe int_SYSRQ passwd=”plaintext_password” tolerance=43200

# Track Listing within CPIO archive
root@host:# cpio -it < apd50_du2_WedOct09_part1.cpio 2>/dev/null

# reset too many password attempts
root@host:# pam_tally2 –user aderidde –reset=0

Networking

# Bonding Options

Options are set in /etc/modprobe.conf

* mode 0 = balance-rr
packets are spread across all interfaces in the bonded interface

* mode 1 = active-backup
one interface (the primary) is up until it fails, when it comes back up, failback to it
all interfaces have the same MAC address. After failover/failback, the interface sends
out one ARP packet to alert the switch that it’s active

* mode 2 = balance-xor
Use a randomizer algorithm to decide which port

* mode 4 = 802.3ad
This is described by 802.3ad dynamic link aggregation = LACP
Contrast this to ‘static link aggregation = etherchannel’
This must also be set on the switch ports (negotiates at boot – the entire bonded interface will not come up if one side is down)

* mode 5 = balance-tlb
adaptive transmit load-balancing (no switch-level support needed).
all inbound traffic comes in one interface. outbound is distributed across slaves based on speed

* mode 6 = balance-alb
adaptive load balancing (transmit and receive)
The bonding driver overwrites the sending MAC HW address so that each client is assigned to talk to one of the slaves.
Sometimes the bond interface itself will send out ARPs which the bond driver has to “fix” by having the slaves
update their clients (“nope you’re still supposed to be talking with me, not the active slave”)


# Create a VLan-Tagged Interface 

# vconfig add bond0 241 (add vlan241)
# brctl addbr

SnooP Cisco Discovery Protocol / CDP packets

Cisco switches can get set to broadcast info about the switch ports
Show CDP = eth switch port for unix systems
tcpdump -nn -v -i eth1 -s 1500 -c 1 ‘ether[20:2] == 0x2000’|grep -E ‘0x01|0x06|0x03|0x0a’

Show CDP = ethernet interface connections on ESX machines
vmware-vim-cmd hostsvc/net/query_networkhint|grep -E ‘vmnic|devId|portId|hardwarePlatform’|sed -e ‘s/^[ \t]*//’|tr -d ‘\n’|sed ‘s/device/\ndevice/g’; echo;

Show CDP = ethernet interface connections on Solaris
snoop -d bge0 -s 1500 -x0 -c 1 ‘ether[20:2] = 0x2000’

Note:  Brocade/Foundry alternative to  CDP is FDP
Note:  LLDP (link layer discovery protocol) is vendor-independent. Brocade supports it.  protocol for LLDP is 0x88cc
# Switch:   tcpdump -i eth0 -s 1500 -XX -c 1 'ether proto 0x88cc'
# Neighbors : 
 tcpdump -v -s 1500 -c 1 '(ether[12:2]=0x88cc or ether[20:2]=0x2000)'

Security

OpenSSL Tricks – SSL Certificate Expiration

KyloRen:~ aderidde$     openssl   s_client -connect ivzwmdm.iot.motive.com:443 | \

openssl   x509      -noout  -dates
notBefore=Mar 10 00:00:00 2017 GMT
notAfter=Mar 10 23:59:59 2020 GMT


Miscellaneous

#Error on console – I/O blocked for more than 120 seconds.
Fix –
Edit /etc/sysctl.conf
vm.dirty_background_ratio = 5
vm.dirty_ratio = 10


# Tell me all used IP addresses in the subnet:
nmap -sP 10.151.242.0/24


# Increase Maximum Postfix message size
postconf -e message_size_limit=60000000 && vi /etc/postfix/main.cf
> (add) message_size_limit = 60000000
[root@linuxprd00 postfix]# postconf -n | grep message_size
message_size_limit = 60000000

# xargs on Solaris10  and  list zoned network configs
# -i = replace {} with values -n 1 = one value at a time
root@solaris_ftp00 # zoneadm list | grep -v global | xargs –i zlogin {} “hostname; netstat -rn | grep default; echo ‘ ‘”

MS Word Tip – Expand/Collapse sections of a document

Tags

,

Alternate title –  Where is my f’n ten-page document and why am I left with one line and a silly triangle?

MS Word 2013 offers a cool new feature: the ability to collapse/hide sections of a document.

MSWord13_SectionCollapse

The picture above shows a document with a collapsed Mid Header2 section (and collapsed Mini Header section).

Why Collapse?

If you have a complex document, it’s clever to present, at first glance, only highlights/ structure of the document, but to allow the reader to dig into the complexity at her pace and according to her interests. I first fell in love with this feature on Wiki pages where we could offer a list of OS configuration options but clicking on any option would show the details for that option only. I am happy to see it available for Word docs.

How To Collapse? 

MS Word offers this feature only at the heading level.  If you click on a heading or hover your mouse over any heading (more below), a triangle appears at the bottom left of the header line. If you click on this icon all text down to the next heading of equal priority disappears – showing only the header and an always-visible icon next to the paragraph which allows you to re-expand the paragraph.  If you print the document, the collapsed
section does not print (and the expansion icon is not printed).

Headings? 

Headers are found on the Styles section of the Home ribbonbar. See the graphic for an example.  Headers allow you to create an outline for your document: to group it into sections and subsections. To create a heading, select a line and click the level of heading it should become: Heading1 for the document title, Heading8 for a minor section and several options in between.  To discharge a line back into the general population of text, highlight it and click the Normal style.  Hovering over a heading style on the toolbar will cause a square dot to show up next to all headings.
You can change the properties of a heading level by right clicking the toolbar heading. Then select paragraph and set the style changes to apply them to all headings of that type. As you can also see in the picture, you can even set a paragraph style to be hidden by default. Most headers start with a number, but you can delete this, or you can choose not to include numbers in the header properties.

Notes about Yum, Spacewalk, public-yum.oracle.com

YumUpdateChecksumFailure

(click image to enlarge)
  Error from Yum  :   ‘Metadata file does not match checksum’

Circumstances:    I run ‘yum repolist’ as root to update the repository package lists.
Running ‘yum clean all’ surprisingly does not fix the problem.

Explanation of the error: In order to verify that the files that yum downloads, yum sends along a file called ‘repomd.xml’ (which is stored in the directory /var/cache/yum/x86_64/6Server/ol6_latest or similar) The purpose of the repomd.xml is to provide checksums for the metadata that yum downloads.

My company uses an HTTP proxy for going out to the internet. This caches some files.
If the source yum file is updated and the repomd.xml file is cached on the HTTP proxy, I may end up downloading a new data file but checking it against the old checksum file.

Fix: Tell yum to never use cached data (at least temporarily) by editing /etc/yum.conf and adding a line ‘http_caching=none’. Then  ‘yum clean metadata’ ‘yum repolist’.
As soon as you kick off the ‘yum repolist’ you can optionally comment out the http_caching line, which I recommend doing this as the cache will definitely speed up yum operations, since you now have the solution for the error if the problem occurs again.